Table of Contents
With the help of automations, you no longer have to manually add rows with certain entries to your tables, but can have these steps performed automatically. To do this, simply define an appropriate automation for any table view.
How to add rows with automation
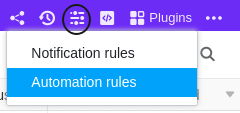
- In the base header, click and then click Automation Rules.
- Click Add Rule.
- Name the automation and specify the table and view in which it should act.
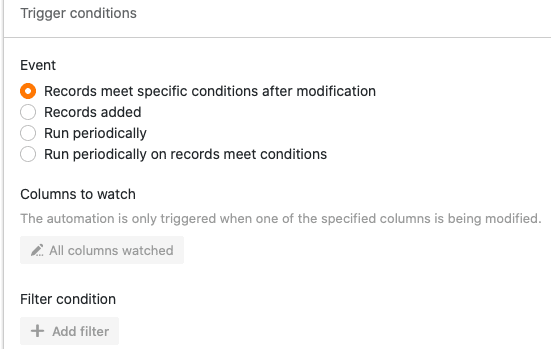
- Define a trigger event that triggers the automation.
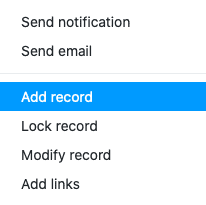
- Click Add Action and select Addrow as the automated action.
- Confirm with Submit.
Creating the automation
First define a trigger event for the automation.
Then select Add row as the automated action.
In the next step, define the entries that should appear in a row after the automation is triggered. By clicking on Add field you can define any entry you like.

First, select the column into which the entry should be inserted.
Then you can define the entry. Depending on the selected column type , different options are available to you.

Finally, activate the automation with a click on Submit.
Example use case
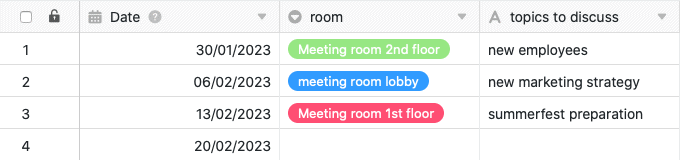
A concrete use case for this type of automation could occur, for example, when you record your weekly team meetings in a table. You want a row with certain entries to be added automatically every week before the meeting starts, so that you only have to enter the remaining information manually.
In this context, you could predefine, among other things, the date of the meeting, the meeting room and the fixed topics.

Creating the automation
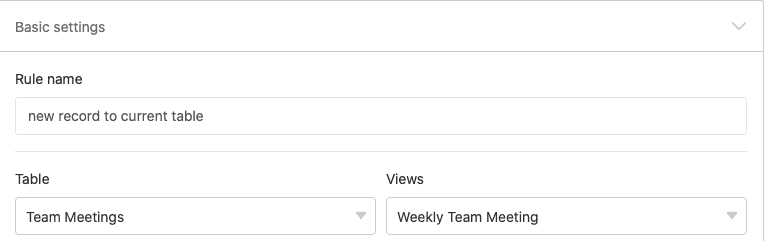
First, give the automation a name and select both the table (here: Team Meetings) and the view (here: Weekly Team Meeting) in which the automation should act.
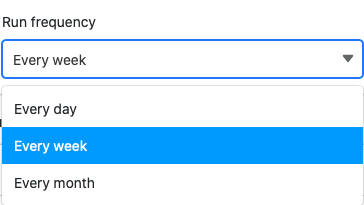
As the trigger event of the automation, select the option Periodic trigger.

Then define at what intervals the automation should be executed. To have the row with the corresponding entries added to the table every week, select weekly.
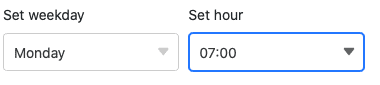
You can also select a specific day of the week and a specific time at which the automation should be triggered. In our use case, it makes sense to choose an hour before the weekly meeting on Monday morning as the trigger time.
In the next step, define Add row as the automated action.

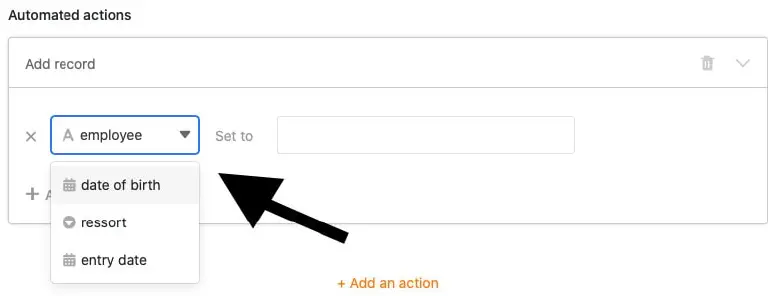
By clicking on Add field, you can define as many entries as you like that will automatically appear in the row.
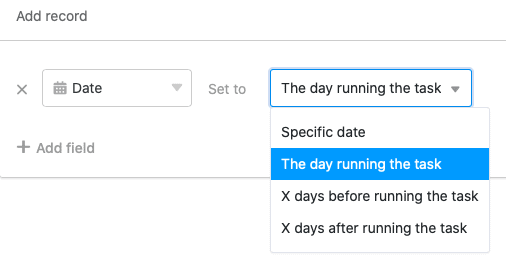
To automatically record the respective date of the team meeting scheduled on the same day in the row, select the date column and the value The day of execution.
By clicking on Add field you can define any number of additional entries that fill the row once the automation is triggered. Simply select a corresponding column of your table from the drop-down menu and define a value in the adjacent input field.

If, for example, the team meeting usually takes place in a specific room, you can define that room as a fixed value. And if certain topics (such as new hires, departures, anniversaries) are on the agenda of every team meeting, you can have them automatically entered in the row as well.
Testing the automation
If the automation works as desired, SeaTable will automatically add a row with the previously defined entries to your table after the periodic trigger fires (here: every Monday at 7 a.m.). This saves you some keystrokes, and you can then enter the remaining open data manually.