Table of Contents
Available with Enterprise
Automations are a powerful feature of SeaTable that lets you automate processes. By automating manual steps, you not only save time, but also minimize human errors when working with data.
Basic information
- Automations are always created as individual automation rules that relate to a specific table view.
- The two most important components of an automation are the trigger event and the automated action(s).
Trigger events
A so-called trigger is an event that initiates the automation. You define this event individually for each automation rule. The fact that a row has been added or modified in a table view can act as a trigger. A specific time at a defined interval (daily, weekly or monthly) can also trigger an automation.
For certain events, such as adding records, you can also make additional settings. For example, you can specify whether all columns in the table view or only selected columns are to be monitored for the occurrence of the trigger event. If you select single columns in this context, the automation will only be triggered if the event occurs in the selected columns.
In addition, you can narrow down the conditions of the trigger event so that the automation is triggered exclusively when certain data is found in certain columns. For example, you can define exact values that must be present in a selected column after an entry is added or changed for the automation to fire.
You can learn everything else in the article Automation Triggers .
Automated actions
Automated actions are those actions that are triggered by the occurrence of the specified trigger event. Automated actions are therefore always a consequence of trigger events and occur only when those events occur under the specified conditions.
Depending on the selected event, you can choose between different actions, such as sending an e-mail or notification to one or more users, adding, modifying or locking a record or executing Python scripts or AI functions.
For many actions, additional requirements must also be met. For example, you need certain column types, an e-mail account or templates in the page design or report design plugin to make more complex automations possible.
If you want to learn more about automated actions, read the article Automation Actions .
How automation works
How automation works is explained in more detail below using an example.
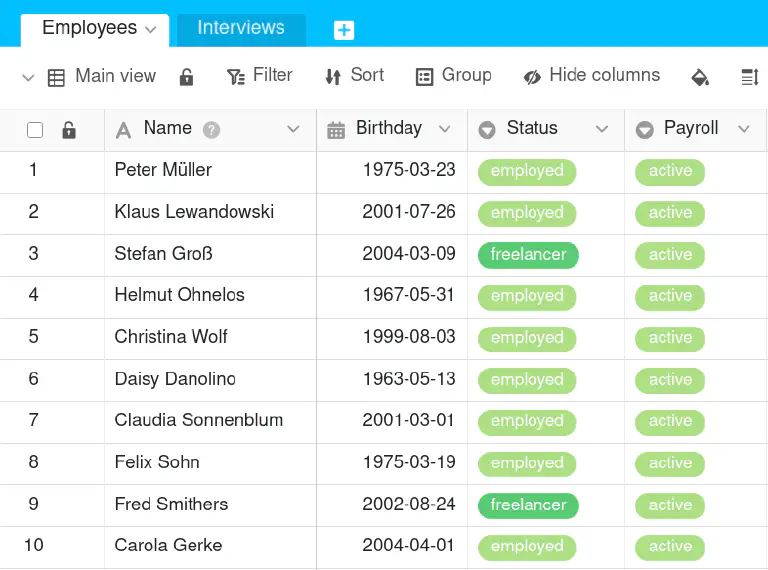
You could use the sample table shown in the image in the HR department of a company to record the employment status and the status of salary payments in addition to employee data.
You then create an automation for the table view to automate a work step. Specifically, whenever an employee leaves the company, i.e. whenever the entry in the Status column changes from “employed” or “freelancer” to “terminated”, “parental leave” or “retired”, the entry in the Payroll column is to be set from “active” to “inactive”.
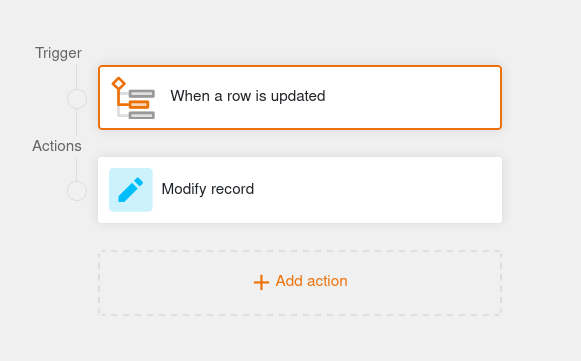
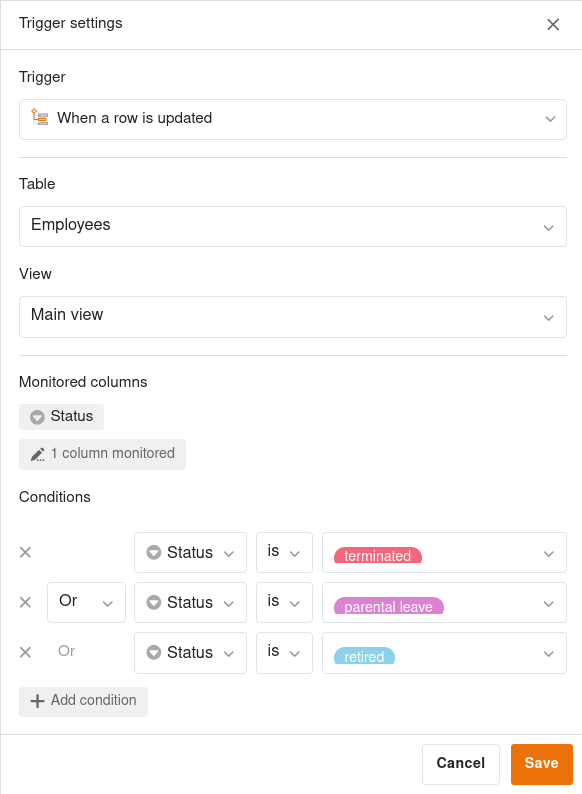
To automate this process step, first define the “When a row is updated” event as a trigger. In the trigger settings, select the table and view and enter the “Status” column as the monitored column. As a specific condition for triggering the automation, specify that the updated row in the corresponding column must have the value “terminated”, “parental leave” or “retired”.
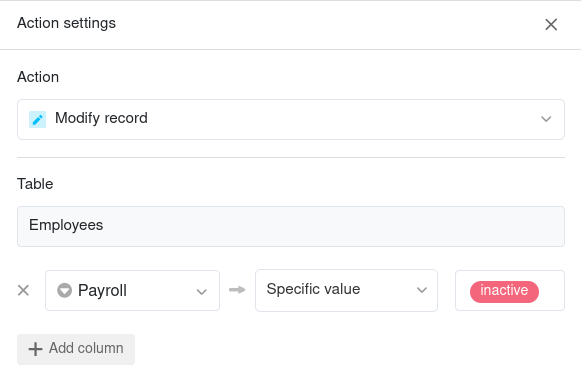
Then select the Modify record option as the automated action. Specifically, the entry in the “Payroll” column should be set from “active” to “inactive” after the trigger event has occured.
After you have created the automation, the manual change in the “Status” column automatically triggers the desired adjustment of the entry in the “Payroll” column.