Table of Contents
In this guide, you will create an automation with the Run AI action. Once set up, SeaTable will automatically process your data using an AI model — for example to summarize texts, categorize entries, or extract information.
Prerequisites
- SeaTable Enterprise subscription (Cloud or Self-Hosted)
- SeaTable version 6.0 or higher
- A base with a table containing text data
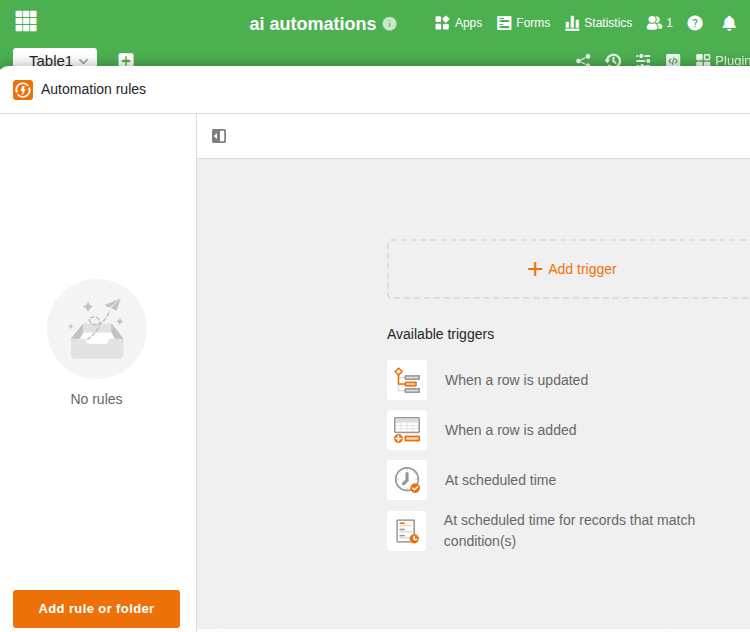
Step 1: Create an automation rule
- Open your base and click in the base header, then click Automation rules.
- Click Add rule or folder and select Add rule.
- Give the automation a meaningful name, for example “Summarize support requests”.
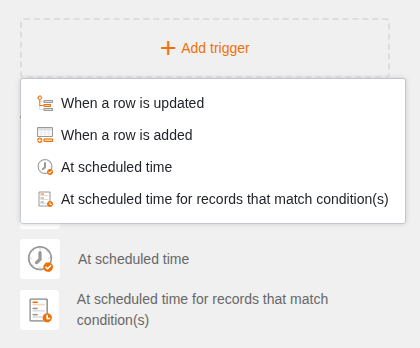
Step 2: Choose a trigger
Click Add trigger and select a trigger. Two triggers are available for AI automations:
- When a row is updated — the AI processes the changed row immediately
- When a row is added — the AI processes every new entry automatically
Then select the table and view in which the automation should operate. Optionally, you can define conditions to trigger the automation only for specific entries.
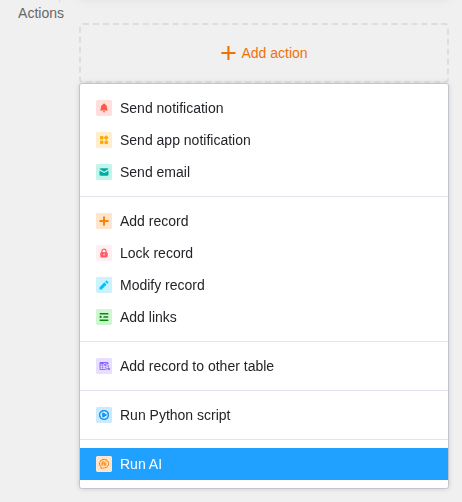
Step 3: Add the AI action
- Click Add action.
- Select Run AI at the bottom of the list of available actions.
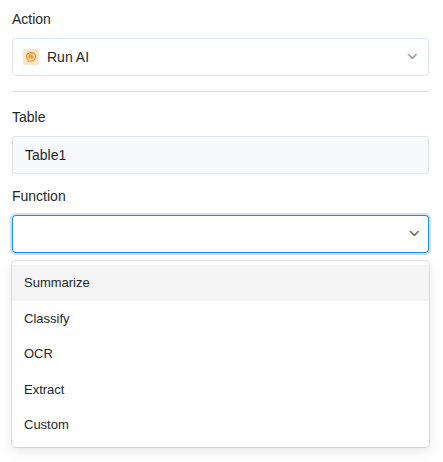
Step 4: Configure the AI function
After selecting the Run AI action, the action settings open on the right. Configure the following:
Table
Select the table in which the AI should work. Usually this is the same table as in the trigger.
Function
Choose one of the five available AI functions:
| Function | Description | Typical use |
|---|---|---|
| Summarize | Summarizes texts | Condense long descriptions |
| Classify | Assigns categories | Categorize support requests |
| OCR | Recognizes text in images | Read business cards, invoices |
| Extract | Extracts specific information | Pull invoice number, date |
| Custom | Custom prompt | Translate, evaluate, rephrase |
Input columns
Select one or more columns whose content the AI should process. This is the text (or the image/file for OCR) that the AI receives as input.
Prompt
For all functions except OCR, you can enter a prompt to control the result. For example: “The summary should be no longer than two sentences and written in English.” For OCR, no prompt is needed — the AI recognizes the text in the image automatically.
Result column(s)
Select the column where the AI result should be written. The column type must match the chosen function — for example a text column for summaries or a single-select column for classifications.
Step 5: Save and activate
- Click Save to save the action settings.
- The automation is now active and will run automatically the next time the trigger event occurs.
Test the automation
To test the automation immediately, trigger the event manually:
- For When a row is added: Create a new row with test data.
- For When a row is updated: Change a value in a monitored column.
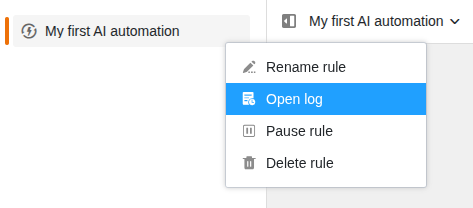
Then check whether the AI has written the result to the result column. You can view the status and any errors in the execution log .
Common issues
| Problem | Solution |
|---|---|
| The result column stays empty | Check whether the input column actually contains a value. Empty inputs produce no result. |
| Wrong column type | The result column must match the result. Classifications need a single-select column, summaries need a text column. |
| Automation is not triggered | Check whether the automation is activated and whether the change happens in the correct table and view. |
Next steps
Detailed guides for each AI function can be found in these articles: