Table of Contents
Microsoft 365, the popular online service for Microsoft’s Office applications, can be used to send emails from SeaTable. Authentication against your Microsoft 365 must be carried out using Microsoft’s modern authentication. (Authentication via user name and user password is not possible with Microsoft 365).
Preparation in the Entra Admin Center
To be able to use your Microsoft 365 account in SeaTable for sending emails, you must first create and configure an application in Microsoft’s Entra Admin Center.
-
Log in to the Microsoft Entra Admin Center . The user needs admin rights for the account that is to be used for sending.
-
Click on App registrations in the page navigation.
-
Create a new login by clicking on + New registration. Enter a name (e.g. ‘SeaTable’) and select Any Entra ID Tenant + Personal Microsoft accounts as the account type. Register the following redirect URI for an app of type Web:
https://cloud.seatable.io/oauth/third-party-email-accounts/callback/If you are not using SeaTable Cloud, replace cloud.seatable.io with the host name of your SeaTable instance. Complete the creation of the app registration by clicking on Register.
-
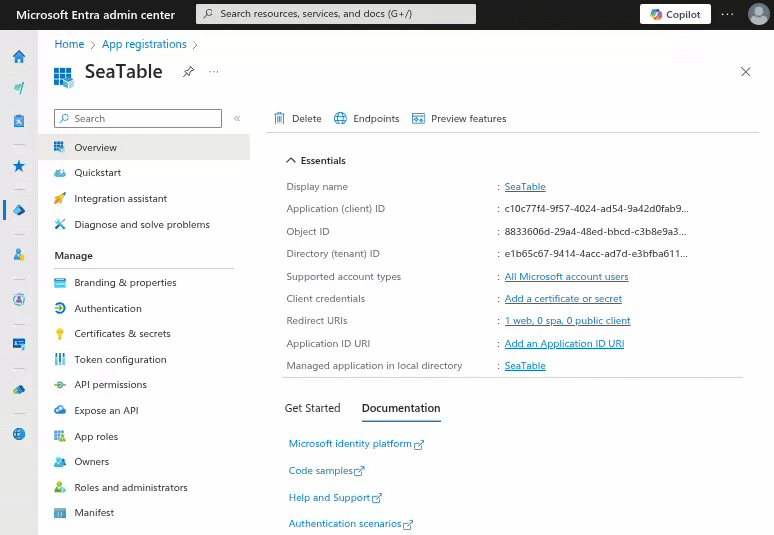
Note the Application (client) ID on the overview page of the app you just registered. This is required to set up the email account in SeaTable.
-
To generate the client key, navigate to Certificates & secrets in the navigation of the app. Click New client secret. Enter a description and an expiration date for the key.
-
Copy the value of the created key to the clipboard.
With this, you have made all the preparations to be able to use your Microsoft 365 account as an email account in SeaTable.
Creation of the email account in SeaTable
Now you need to add your Microsoft 365 account as a third party account in your SeaTable base. To do this, the following steps are necessary:
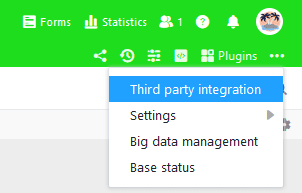
- Open the extended base options by clicking on the three-dot icon in the top right-hand corner.
- Select the item Third party integration.
- Click on Add email account.
- Select Microsoft (Microsoft 365 and Outlook) as the service provider.
- Enter the following information and then click on the Submit button in the upper right corner:
- Account name: any name for the account, e.g. ‘Microsoft 365’
- Application (client) ID: the application (client) ID of the created app
- Client secret: the client secret of the created app from the clipboard
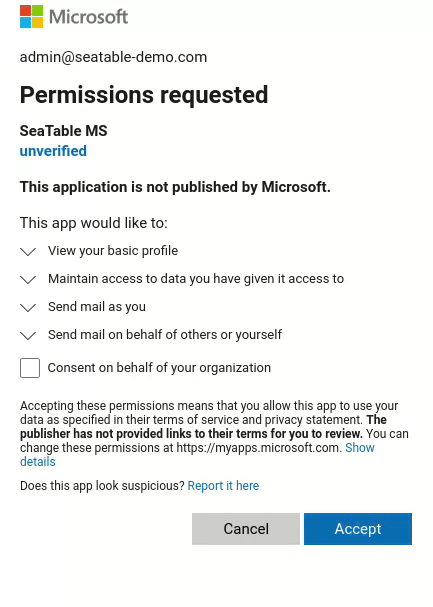
- Grant the requested permissions by clicking Accept.
Send emails via automation or button
After that, you can use the email account created in your SeaTable base to send emails via automation or button.
If you want to learn more about this useful feature, read the article Setting up an email account in a base .