Table of Contents
Available with Enterprise
To precisely control access to your data, you can set individual page permissions for each page you have created in a Universal App. You edit the permissions through the page settings.
Set and edit page permissions
- Open a base to which you have already added a Universal App.
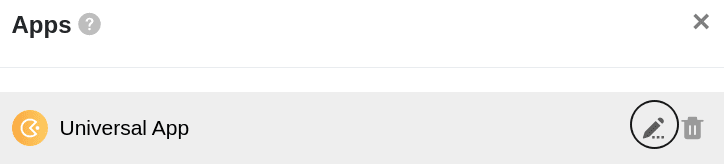
- Click Apps in the base header.

- Hover your mouse over the Universal App and click the pencil icon
.
- Select the desired page from the navigation on the left side of the page and click on the gear icon
.

- Set the desired permissions in the page settings that appeared on the right side of the page.
- The defined page permissions are automatically saved and immediately applied.
Which page authorizations are available
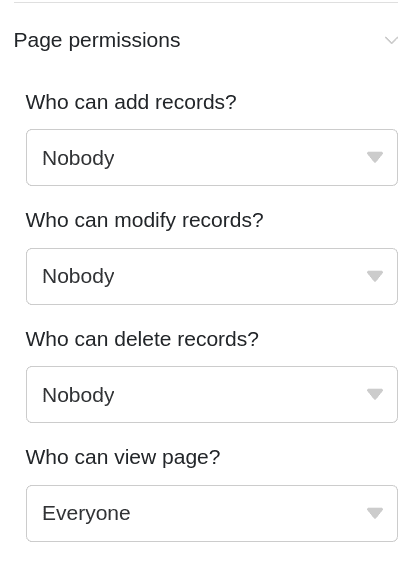
You can set the following page permissions:
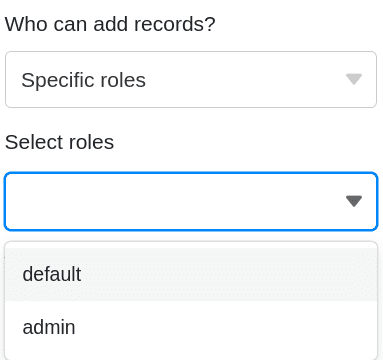
- Who may add rows ?
- Who may edit rows ?
- Who may delete rows ?
- Who can see the page?
Not all page permissions are available for all page types . Take a look at this overview:
| Page type | Add records | Modify records | Delete records | View page |
|---|---|---|---|---|
| Table page | ||||
| Form page | ||||
| Gallery page | ||||
| Calendar page | ||||
| Custom page | ||||
| Kanban page | ||||
| Timeline page | ||||
| Query page | ||||
| Single record page |
Which user groups you can authorize
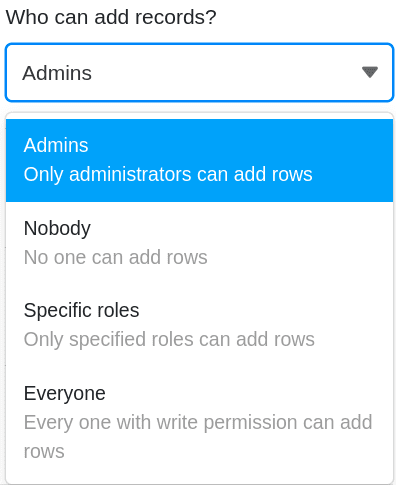
For each permission, you can choose from the following options to narrow down the group of people: Nobody, Administrators, Specific Roles and Everyone.
Select the Specific roles option to define your own roles. To do this, create new roles for individual user groups in the User and Role Management beforehand, to which you can assign permissions individually on each page of the Universal App.