Table of Contents
To prefill web forms, you have the option of defining default values in the form fields. You can do this directly in the URL or using a user-friendly function in SeaTable.
Generate form link with default values in SeaTable
SeaTable offers a function with which you can easily generate form links in which default values are already defined in advance.
- Create a web form .
- In the web form editor, click on the Share button in the top right-hand corner.
- Now click on the Add form link button and the following input mask will appear:
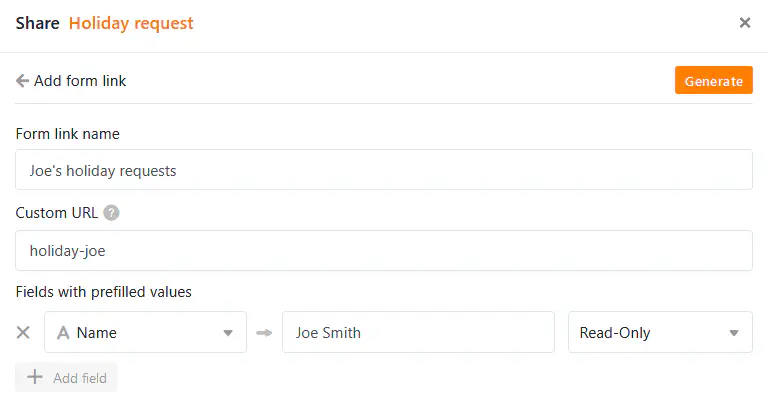
- Give the new link a name. Under Custom URL you can define part of the URL yourself.
- To pre-fill a form field with a default value, click on Add field. Select the form field from the drop-down menu and enter the desired default value.
- Finally, you can decide whether the default value can be changed when filling out the form. To do this, select Read and Write. If you select Read only, the value in the form remains unchangeable.
- Click on Create to generate the link.

The result, i.e. the extended URL, is the same as with the manual procedure described below.
Prefilling a web form directly from the URL
- Create a web form .
- Click on the Share button in the web form editor to receive the link to the web form.
- Copy the link and paste it in a new tab in the browser search bar, where you can edit and test it.
- To prefill a form field with a default value, append the string /?prefill_COLUMNAME=PREFILLVALUE’ to the form link.
Instead of COLUMNNAME put the name of the field you want to fill in; for PREFILLVALUE put the desired default value. Spaces are to be written as %20. Pay attention to upper and lower case.
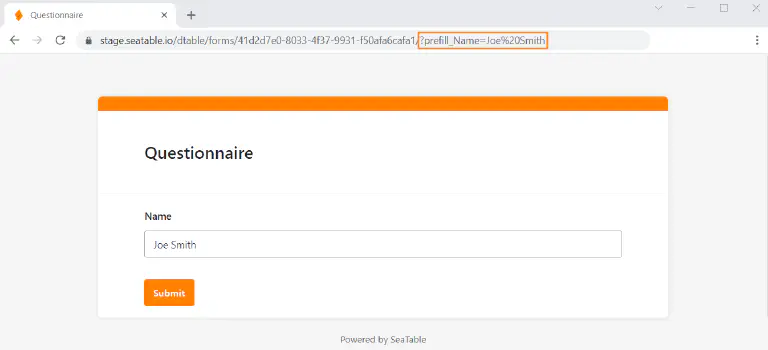
Example: If you want to send Joe Smith a personalized web form with his name already filled in, append the string /?prefill_name=Joe%20Smith to the form link.
To use multiple default values, concatenate the prefill entries with an & character: /?prefill_COLUMNAME=PREFILLVALUE&prefill_COLUMNAME=PREFILLVALUE
Once you are done, you can test the link by pressing the Enter key and opening the web form. If everything worked, you can see the pre-filled default values in this preview.
Prefillable form fields
Depending on which column type a form field is based on, pre-filling is not always possible. In the following overview you can see which column types allow prefilling via URL and which do not.
| Column type | Supports prefilling |
|---|---|
| Automatic number | |
| Image | |
| Checkbox | |
| File | |
| Date | |
| Duration | |
| Single selection | |
| Creator | |
| Created | |
| Formatted text | |
| Formula | |
| Formula for links | |
| Geoposition | |
| Last editor | |
| Multiple selection | |
| Employees | |
| Rating | |
| Button | |
| Signature | |
| Text | |
| URL | |
| Number | |
| Last edited |