Table of Contents
SeaTable allows you to link information from different tables. To do this, use the Link to other entries column type.
To link two tables together
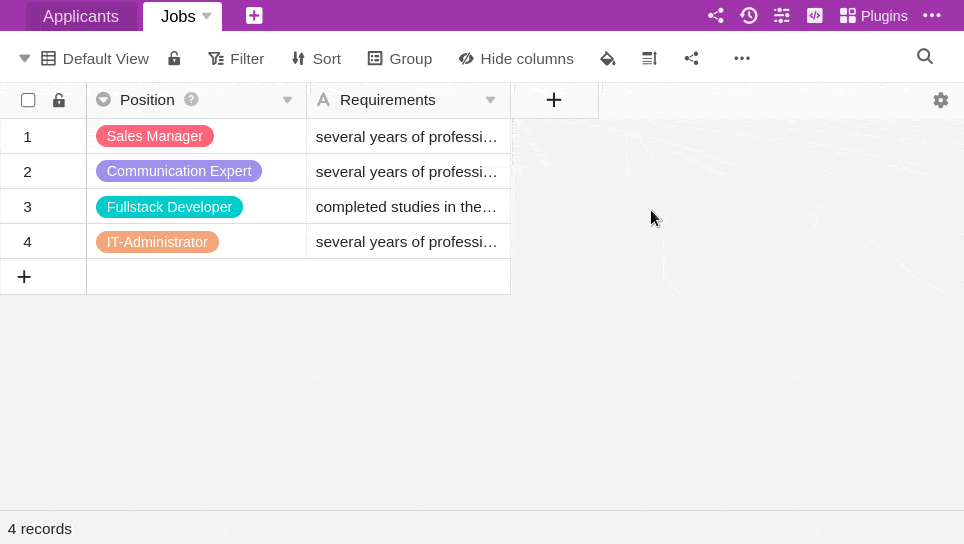
- Create a new column and select the column type Link to other entries.
- Give the column a name.
- Under Select table for linking, select the table whose entries you want to link to the current table.
- Click Submit.
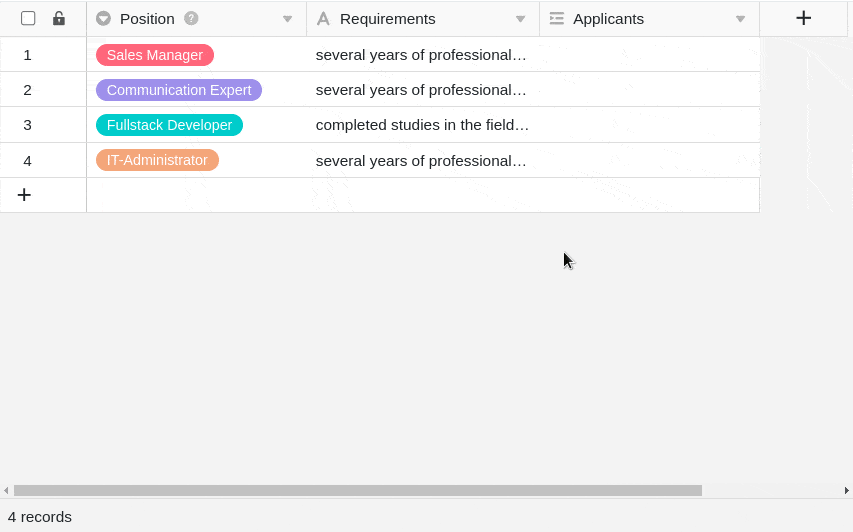
- The content of the new column is still empty. To fill it, you can link existing entries or add new ones rows .
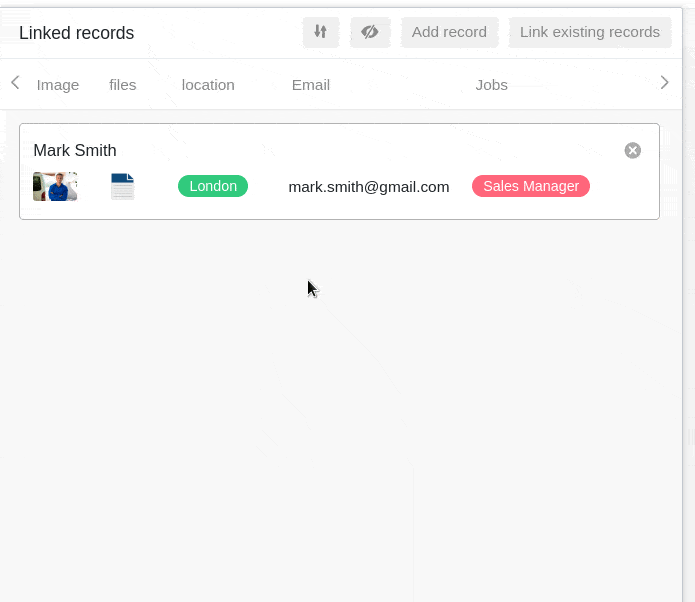
As soon as tables are linked, you can call up the information of the linked entries via the link dialog. To do this, click on the double arrow symbol in a cell of the link column or double-click. The linked entries are listed in the link dialog that opens. Click on an entry to view the row details in an additional window.

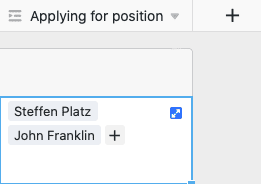
Link existing entries
- Click in a cell of the shortcut column and then on the plus icon that appeared.
- Now the available rows of the linked table are listed. Select the row(n) you want to link to the row of your current table.
- In the link column, each row is immediately displayed as a linked entry.
Using the integrated search function in the link dialog, you can search the entries of the linked table to quickly find the desired row .
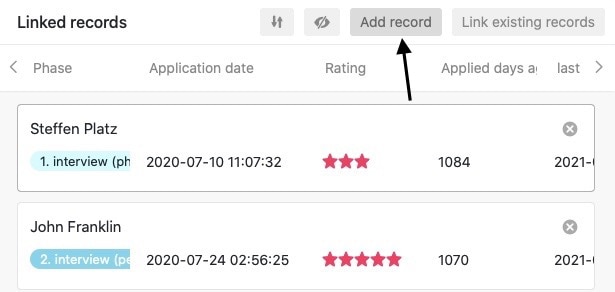
Add new row
You can even add a new row to a linked table via the link dialog without having to switch to this table. Subsequently, the row is added to the linked table among the existing records and displayed as a linked entry in the link column of the opened table.
- Double-click on the cell of a link column or click on the blue double arrow icon to open the link dialog.
- Click row to add.
- In the window that opens, fill in the various table columns.
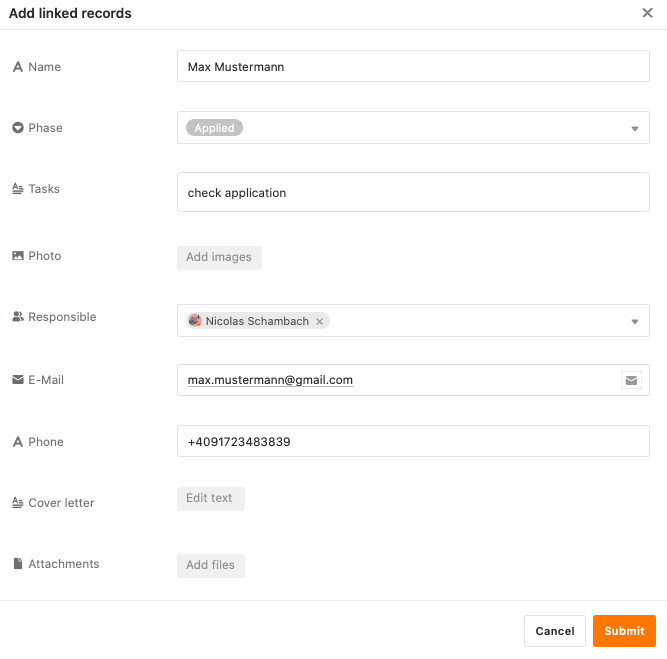
- Click Submit to create the new row .

- The new row is automatically added to the linked table and displayed in the currently opened table as a linked entry in the link column.
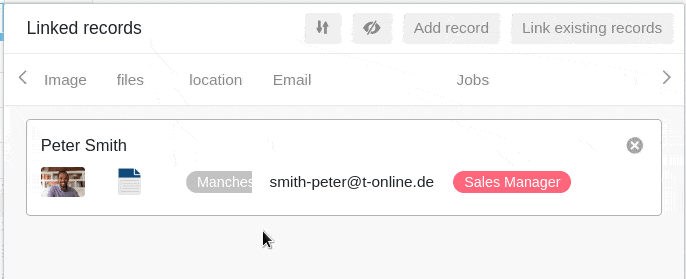
Edit existing entries of a linked table
- Click in a cell of the link column.
- Click on the linked entry you want to edit.
- The row details open. Make the desired changes there.
- Close the window to save the changes.
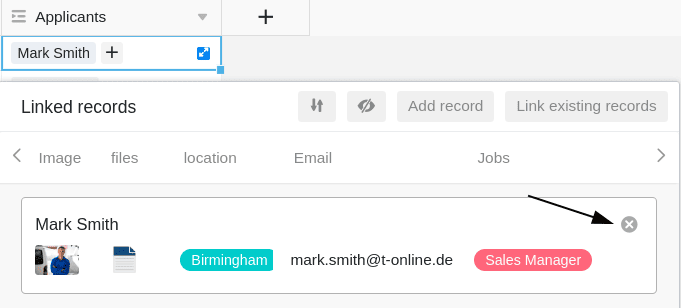
Remove links
You can remove entries linked in a link column with just a few clicks. To do this, simply open the link dialog of the corresponding link column and click on the X symbol to the right of the desired entry.
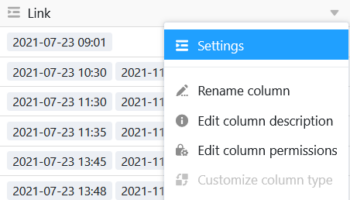
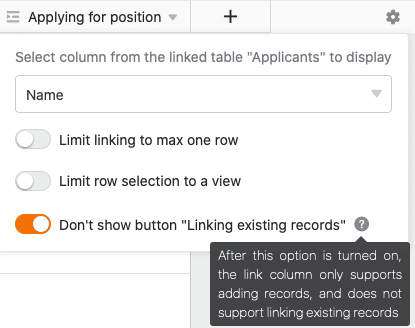
Link column settings
A link column allows you to make and change various settings very easily. To do this, click the triangular drop-down icon of the link column in the table header and then click Settings.
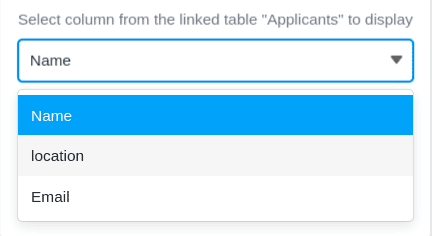
Selection of the linked column from the linked table
In the drop-down menu you can first select the column of the linked table whose entries are to be displayed in the link column.
Restrict links to one row
By activating the corresponding slider you can limit the linking to a maximum of one row. If this setting is active, only one linked entry can be added in each cell of the link column.
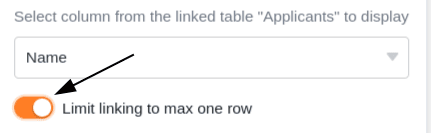
If you have already added a linked entry to a cell, the options to add more entries are no longer displayed.

This setting can be useful, for example, if an invoice is to be linked to the corresponding purchase order from another table - i.e. if the linked records form logical pairs. In this case, adding more links could lead to confusion and negatively affect work processes.
Restrict links to one view
By activating this setting you can restrict links to one view of the linked table. To do this, you specify a previously defined view of the linked table. In the link column, you can then link only the entries of this view. Linking entries from other views is then no longer possible.
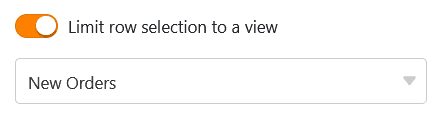
This setting is especially useful for filtered views this setting can be helpful if you want to specifically link individual entries in your tables.
Prevent linking of existing entries
In the settings of a link column you can also prevent the linking of existing entries by activating a corresponding slider. If the slider is activated, the corresponding link column supports only the addition of new rows or entries.
Existing entries in the linked table can then no longer be linked in the column. Entries that have already been linked in the column, however, remain unaffected by the setting.
View options of the link dialog
The link dialog of a link column also provides you with various view options.
Adjust the size of the window
To have all linked entries at a glance, you can adjust the size of the link dialog window. To do this, simply move the mouse over one of the outer borders until the cursor turns into a double arrow, and drag the border in the desired direction while holding down the mouse button.
Adjust column width
To fit more column entries of the linked rows into the window, you can also adjust the width of the displayed columns in the link dialog. To do this, move the mouse over the area between two column names until the cursor turns into a double arrow, and drag the invisible boundary line to the left or right while holding down the mouse button until you reach the desired column width.
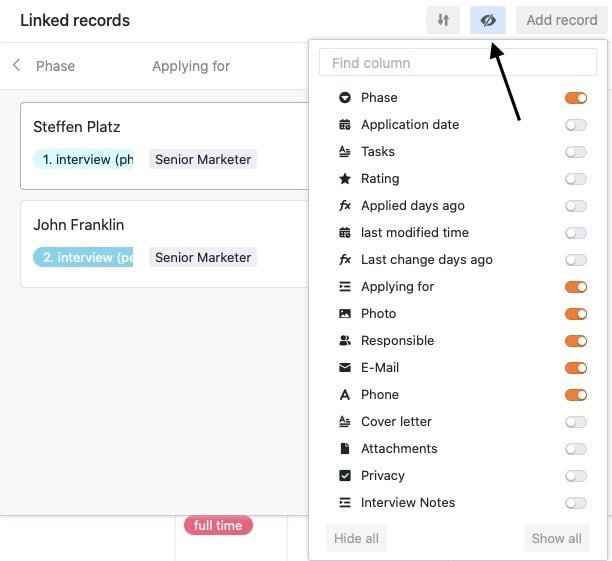
Hide columns
To make the link dialog even clearer, you can hide any number of columns of the linked entries by clicking on the eye symbol. A window opens in which you can (de)activate the individual columns with sliders. Accordingly, the columns are hidden or displayed in the overview of the linked entries.
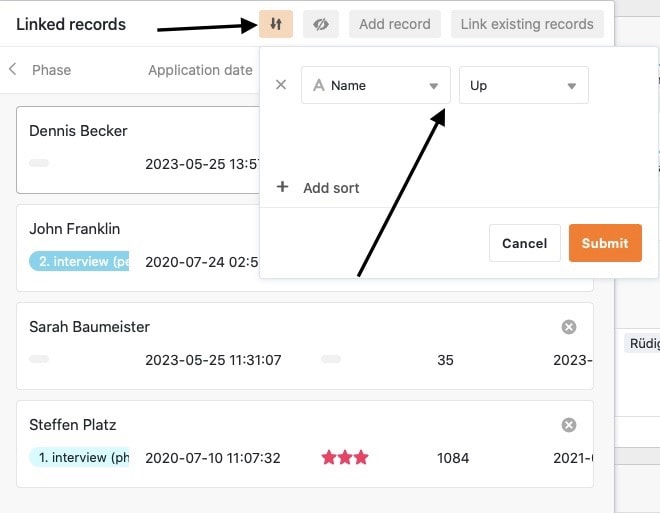
Sort entries
You can sort the linked entries in the link dialog by clicking on the arrow icons. Use this function, for example, to display linked entries in alphabetical order based on a text column or to sort them by another column.
Frequently asked questions
I can't find this column type. Can't I create a link?