Table of Contents
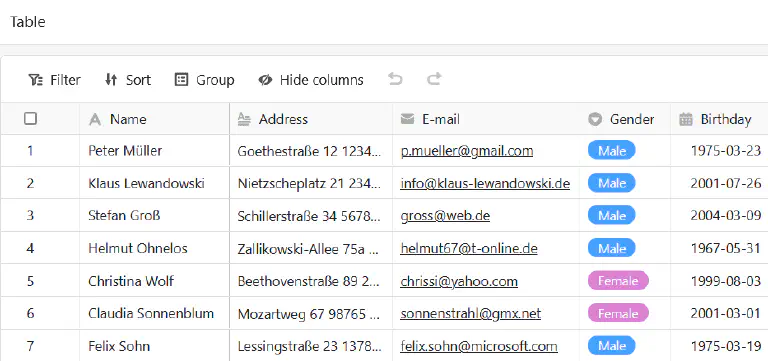
You can use this page type to add a table from your base to your app .
Change page settings
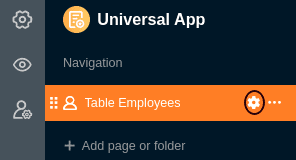
If you want to change the settings of a page, click on the corresponding cogwheel symbol in the navigation bar.
When editing table pages, you can make numerous page settings to tailor the displayed data from the underlying table precisely to a user group.
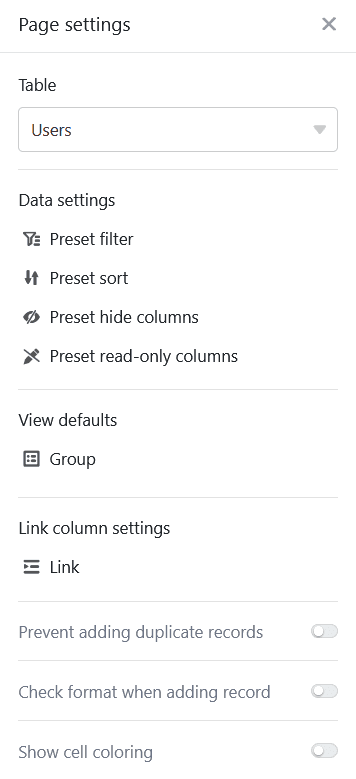
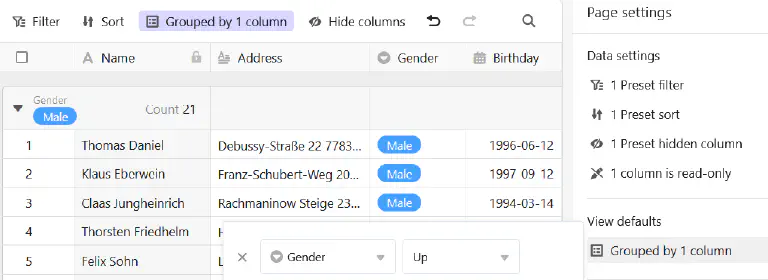
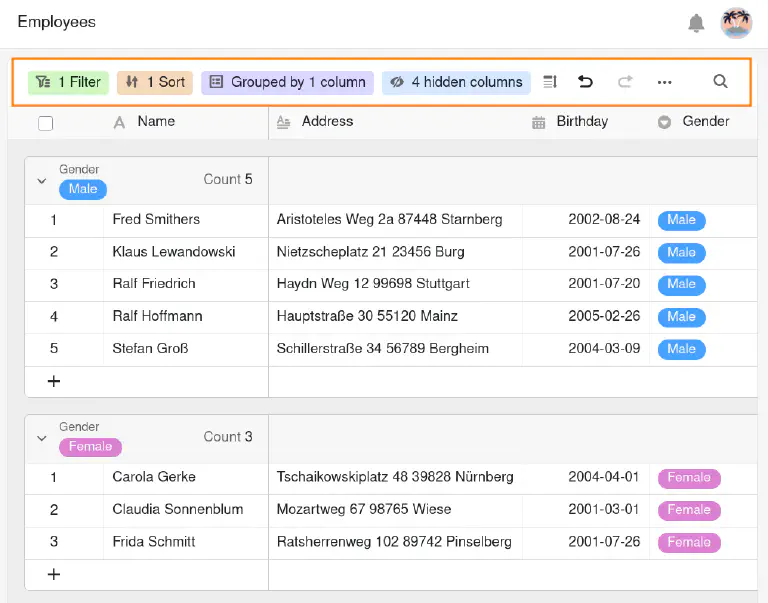
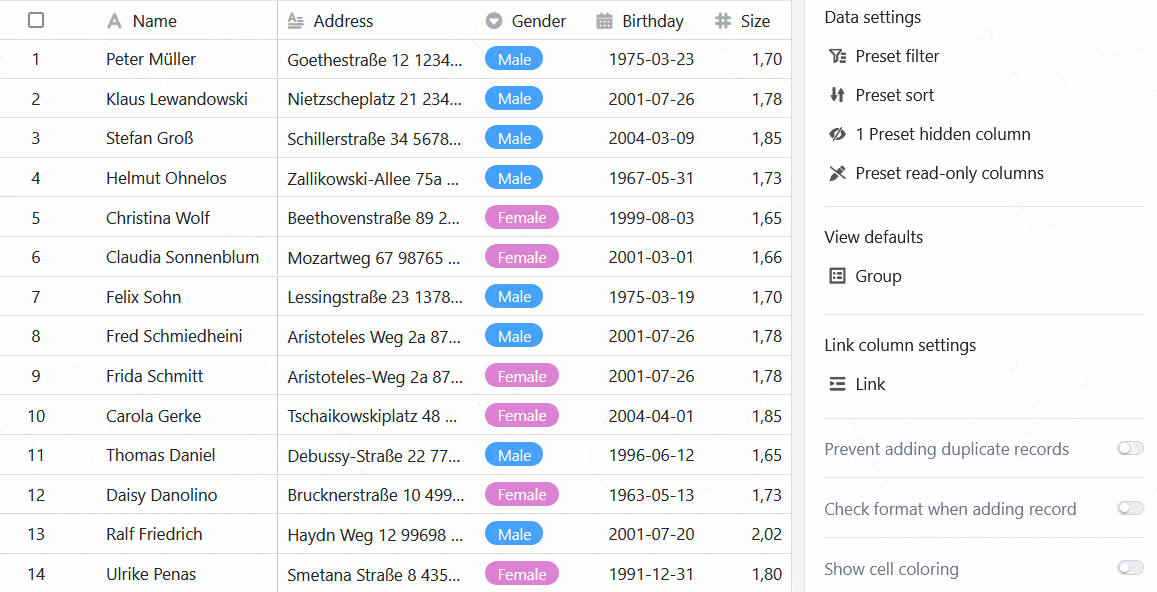
Preset filters, sorting and grouping
You can define preset filters, sorting and grouping in the page settings to limit and organize the displayed data for a user group.
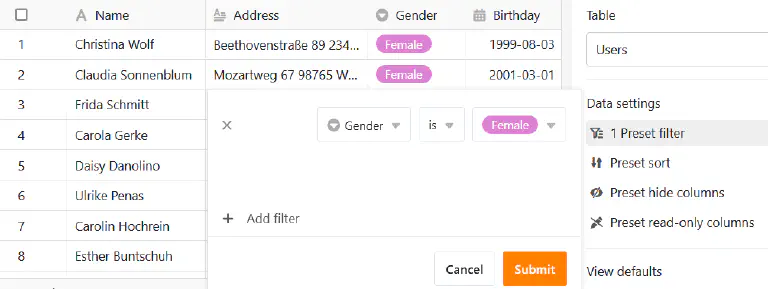
To do this, click on Add filter, Add sort or Add group, select the desired column and condition and confirm with Submit.
Hidden and read-only columns
In addition to the preset filters, you can also define hidden and read-only columns to further restrict the visibility and editability of certain data.
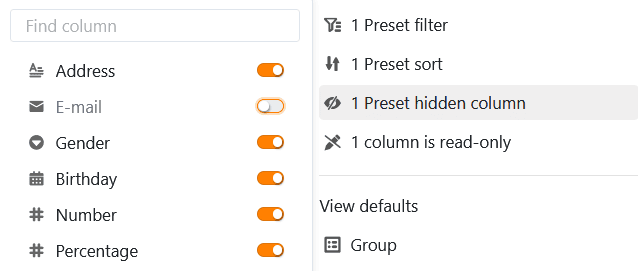
Simply click on the sliders or boxes of the columns that should be hidden or read-only for the users.
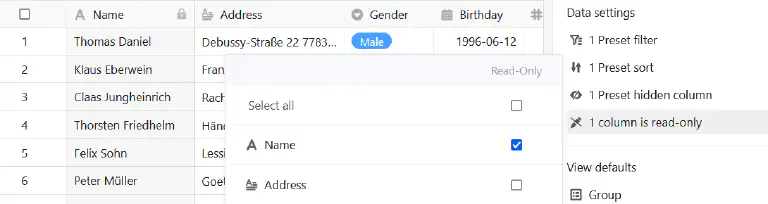
You can recognize read-only columns by the fact that they are highlighted in grey in the table and marked with a lock symbol.
View options of the user
With the view options above the table, app users can make their own additional settings, which work in exactly the same way as in the base. These include
As mentioned above, the user’s individual view settings have no effect on the standard settings you have predefined for the table page. For example, the user can hide additional columns or additionally filter a view that you have pre-filtered, but they cannot display any rows that you have filtered out or columns that you have hidden or even make them visible to others.
Link column settings
In the settings for the link column, you can define which data is visible and which operations are permitted for each linked table.
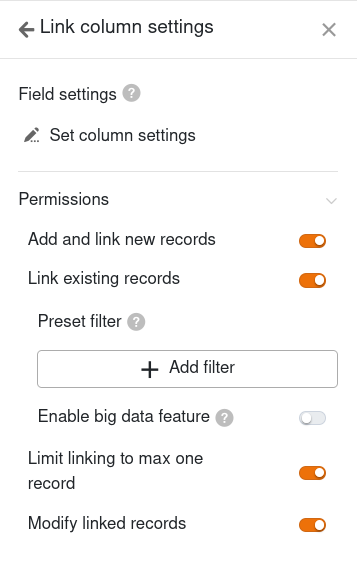
- Field settings: Here you can define exactly which columns the following authorizations apply to.
- Add and link new records: If you activate this slider, users can add new records to the linked table. You can use the field settings to specify which columns are required, i.e. must be filled in.
- Link existing records: If you activate this slider, users can link existing records in the linked table. You can use the field settings to define which columns are visible.
- Preset filter: If you add a filter here, only options that fulfill the filter conditions will be displayed when linking records.
- Enable big data feature: When the Big Data feature is enabled, users can search more than 20,000 records if there are that many records in the linked table.
- Limit linking to max one record: If you activate this slider, users can only link one row of the linked table at a time in the cells of the link column.
- Modify linked records: If you activate this slider, users can edit existing records in the linked table. You can use the field settings to define which columns are editable.
Prevent duplicates from being added
On table pages where different users can make new entries in a base, it is easy for identical rows to be created. You can prevent this by preventing duplicates from being added. To do this, activate the corresponding slider and select the columns in which the values must match for an row to be considered a duplicate. If the addition of an row is blocked, a corresponding error message appears.
Format check for new entries
You can activate another slider to validate entries in text columns . As soon as the format check is switched on, the row details always open when someone wants to add a new entry to the table page - and this is only possible if the entries correspond to the defined format. An error message appears for entries with a different format.
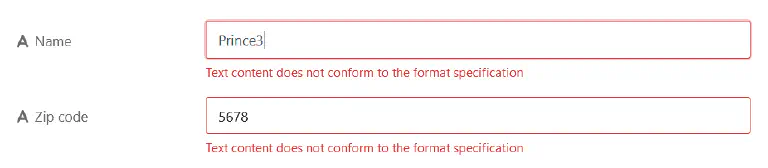
For example, you can minimize typing errors for clearly defined character strings such as zip codes or account numbers. You define the regular expressions for validating the entries when you create a text column in the base.
Show cell formatting
If you use the coloring of cells in the underlying table, you can activate the option to display the cell formatting on the table page with one click.
Export table page as Excel file
This function is disabled by default. If you want to enable Excel export, activate the corresponding slider in the table page settings. All app users who have access to the table page can then export the visible data as an Excel file. To do this, click on the three dots in the view options and then on Export to Excel.
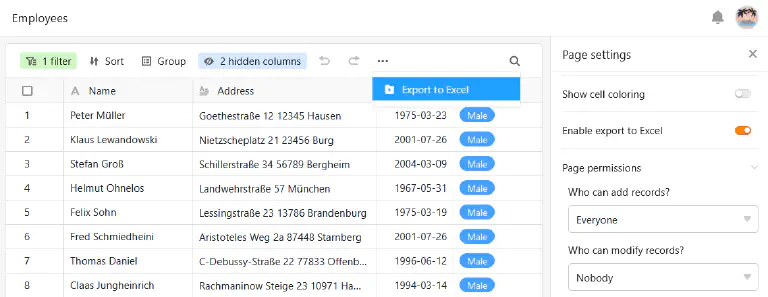
The data exported from the table page is independent of the current view. Even if you filter or hide columns, all data is included in the export.
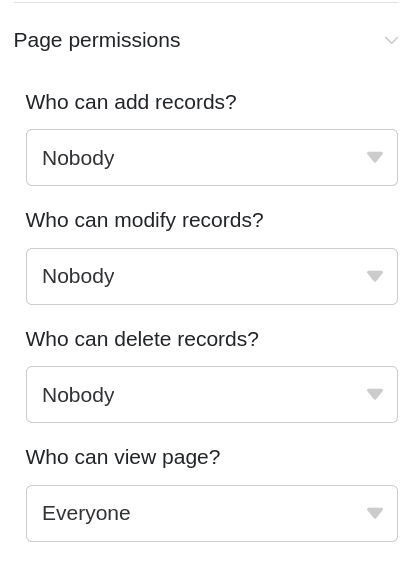
Page authorizations
In the page authorizations , you can set exactly who is allowed to view and edit the table.