Table of Contents
Next, we will focus on the web form. As you have already learned how to create a web form with SeaTable in the first online course, you do not need to do this again. The web form is already integrated into the template.
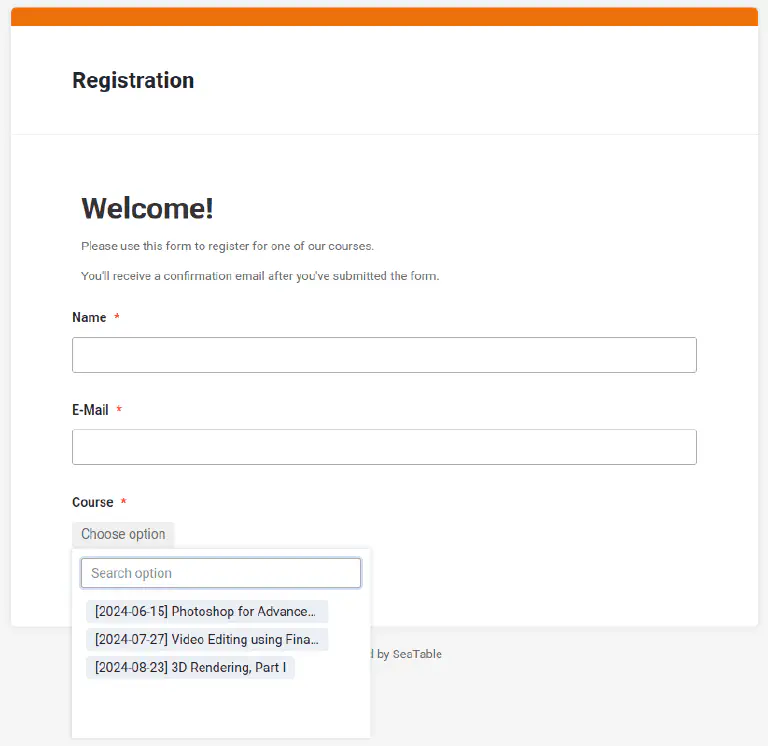
Now open the web form in edit mode and we will briefly discuss the most important points.
The web form and course selection
The web form is deliberately kept simple and only asks for three values:
- Name
- Course
All three fields are defined as mandatory fields. The Name and E-mail fields do not require any further explanation.
The special feature is the course selection: Here you can only select courses that still have places available. Try it out for yourself: If you click on the selection field, only three courses are displayed, although there are a total of five courses in the table.
Why is that? We have changed the selection in the link column to the view
Available Courses which only shows courses with free places. This means that you will only see the courses that are available in this view in the web form.
SeaTable takes this restriction into account and ensures that only courses that are not yet fully booked are offered in the web form.