Table of Contents
If you store a lot of larger files (e.g. images and videos) in a base, you may eventually reach the storage limits of your subscription , and above 100 MB it will no longer be possible to export .
One solution to comply with the limits in this case is to outsource your files to a cloud storage like Seafile, which you can then connect to SeaTable. In the following article you will learn how to integrate a Seafile library into a base.
To connect a Seafile library to SeaTable
- Open the Seafile web interface and log in with your Seafile account.
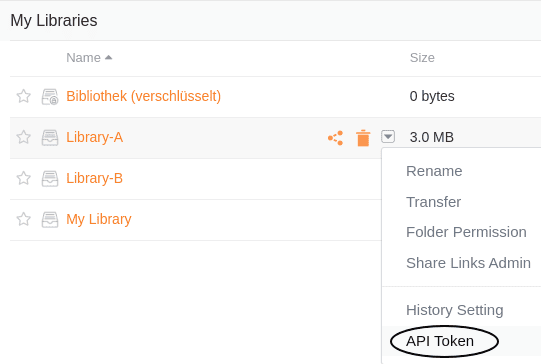
- Click the drop-down icon to open the advanced options of a Seafile library and click API Token.
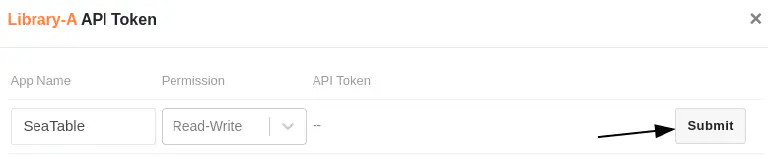
- Name the token, assign a read and write permission or a read only permission and create the token via Submit.
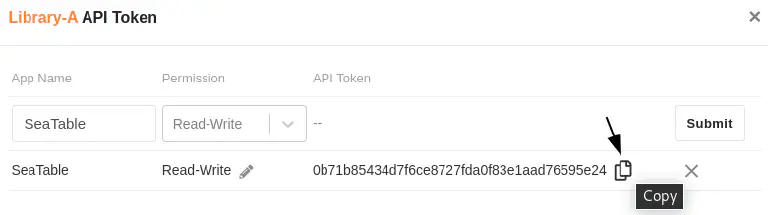
- Copy the API token to the cache.
- After that, open the SeaTable web interface and go to the base where you want to include the library.
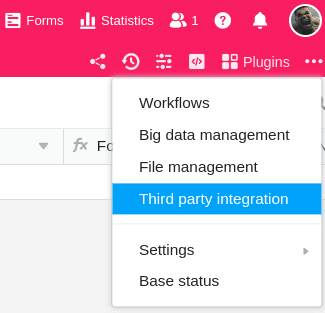
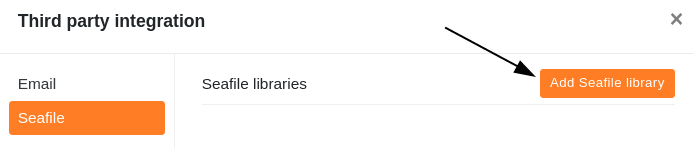
- Click the three dots in the base header to open the advanced base options and select the third-party integration option.
- In the Seafile area, click Add Seafile Library.
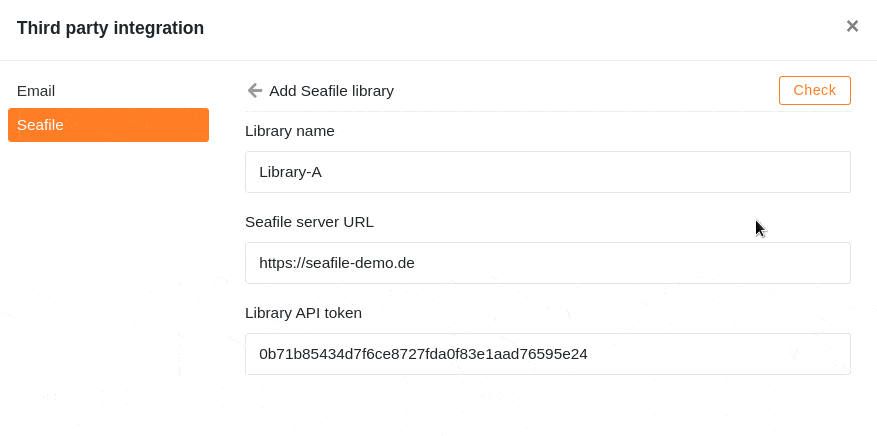
- Enter the name of the library, the URL of your Seafile server, and the library API token you copied earlier.
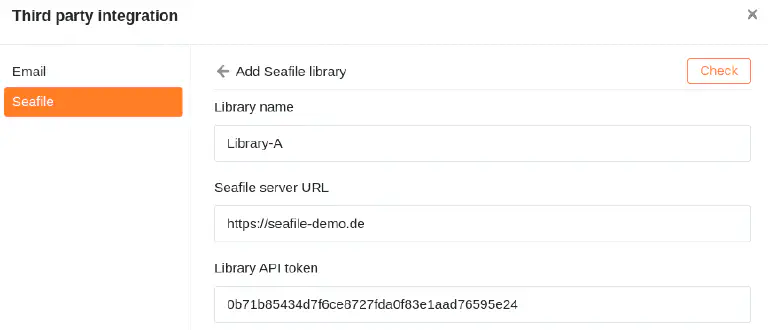
- Finally click on Check. After the success message has appeared, confirm the integration with Submit.
Access files in Seafile
After successful integration into the base, the Seafile library appears as a folder in the file management of your base.
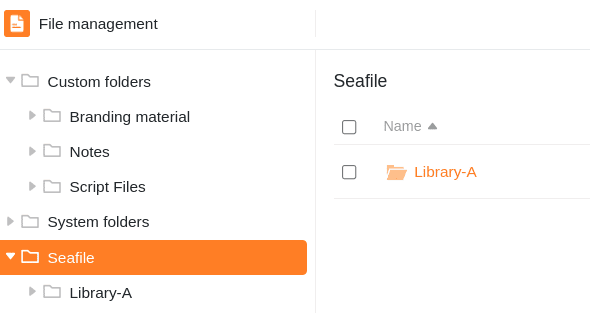
Through this integration, you can use the files stored in Seafile directly in SeaTable.
Integration possibilities
Basically, you can connect both self-hosted and hosted Seafile servers to SeaTable. Feel free to contact our sales team if you want to self-host a Seafile server. For SeaTable Dedicated customers we offer Seafile co-hosting.