Table of Contents
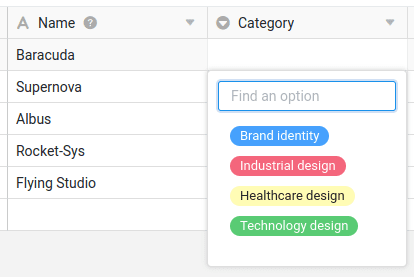
A single select column is ideal if you want to assign exactly one option from a list of options to be defined to your rows. The options are given colorful labels, which you can use to group your data records into categories and clearly arrange tables.
Creating a single-select column
Creating a single-select column is child’s play and can be done with just a few clicks. You can find detailed information under Add a column .
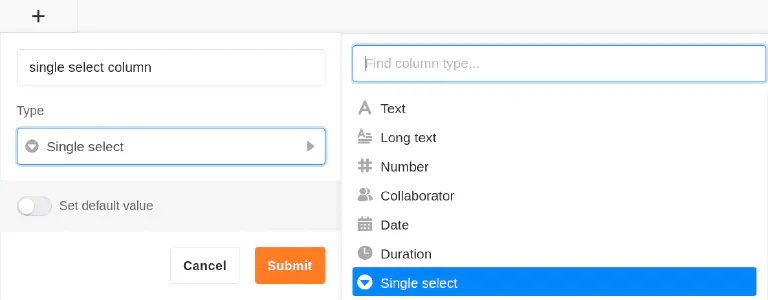
- Click on the Plus symbol to the right of the last column of a table.
- Give the new column a name.
- Select Single select as the column type.
- Confirm with Submit.
Add selection options
In a single select column, you can create various options from which you can then choose when filling the cells. You can add new options to the column in several ways:
- Add options via the column settings
- Add options via the cells of the single select column
- Import options
Add options via the column settings
- Click on the drop-down arrow to the right of the name of a single-select column.
- Go to Edit single select.
- Create as many options as you like by clicking on Add option.
- Confirm each entry with Enter.
- If required, you can adjust the colors assigned to the options.
Add options via the cells of the single select column
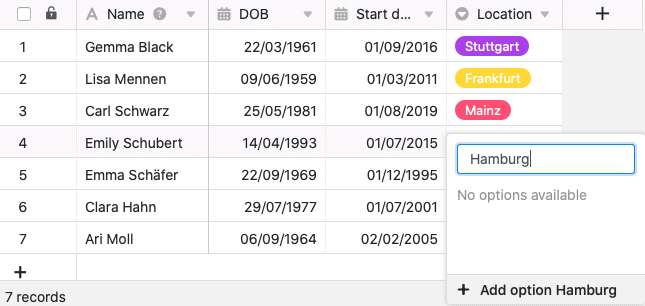
- Double-click on a cell of the single select column.
- Enter a suitable term in the search field that you would like to define as a new option.
- Click on Add option.
- The term entered is then assigned to the selected cell and added to the various options in the column.
Export and import options
You can not only manually enter the options, but also conveniently export them from an existing column and import them into another column. This saves you a lot of work if you want to use the same options – even across different bases – for several single and multiple select columns.
Export options from a select column
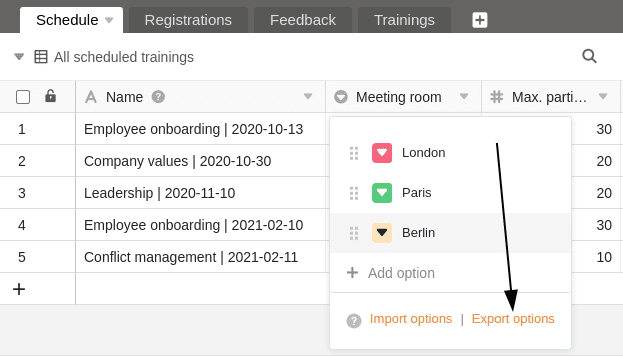
- Click on the drop-down arrow to the right of the name of a single or multiple select column.
- Select Edit single select or Edit multiple select.
- Click on Export options.
The options are now exported as a JSON file. Depending on your browser settings, the download has either been saved directly to your device or you still need to specify a storage location. In the next step, you can import the options into another single or multiple select column.
Import options into a select column
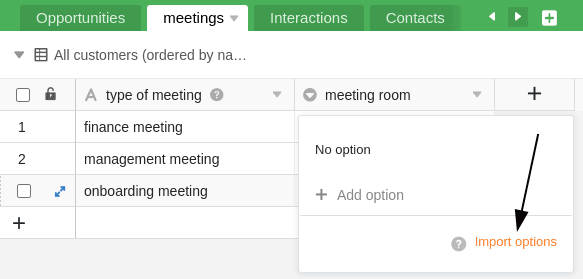
- Click on the drop-down arrow to the right of the name of a single or multiple select column.
- Select Edit single select or Edit multiple select.
- Click on Import options.
- Select the JSON file from your device and confirm the upload.
The options are then imported into the selected column and are ready to be filled in the corresponding cells. You can of course continue to add, delete and edit options as you wish.
Colors of the selection options
To visually design the view within a table, SeaTable assigns a color to each option in a single or multiple select column. You can subsequently adjust this randomly assigned color via the above-mentioned path to the options.
You open the color picker by clicking on the colored triangle symbol in front of the option name.
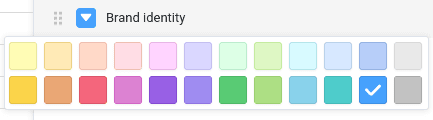
There are currently 24 colors available to visually highlight the respective options. With an Enterprise subscription you also have the option of creating custom colors for your selection options.
Change the order of the options
The order of the options is crucial if you want to sort or group by a single select column. SeaTable does not arrange the options alphabetically, but flexibly according to the order of the options, which you can define as you wish.
- Click on the drop-down arrow to the right of the name of the single select column.
- Go to Edit single select.
- Drag and drop an option to the desired position. To do this, use the grab area with the six dots to the left of each option.
Set default value
For each single select column, you have the option of setting a preset default value . The default value is automatically assigned to each new row as an option.
- Click on the drop-down arrow to the right of the name of the single select column.
- Go to Set default value.
- Select the option from the list that is to be used as the default value.
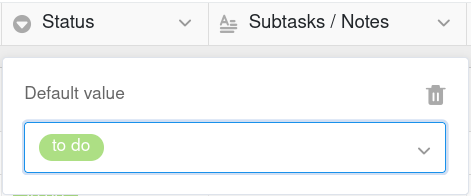
If you want to delete the default value again, click on the trash icon .
Cascading a single select column
Using the cascading function, you can define a parent column of the same type for each single select column, which restricts the available options of the subordinate single select column. This offers the following advantages:
- Cascading allows you to reduce the number of options available in another single-select column.
- By defining dependencies, you can create logical relationships between two single-select columns.
- Especially with a large number of options, this can be very helpful to minimize mistakes that can occur when entering data.
- In addition, cascading single select columns can also help to speed up work processes.
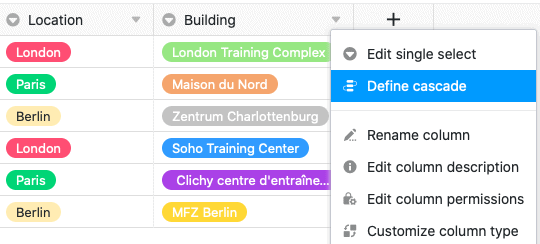
- Click on the drop-down arrow of a single select column.
- Click on Define cascade.
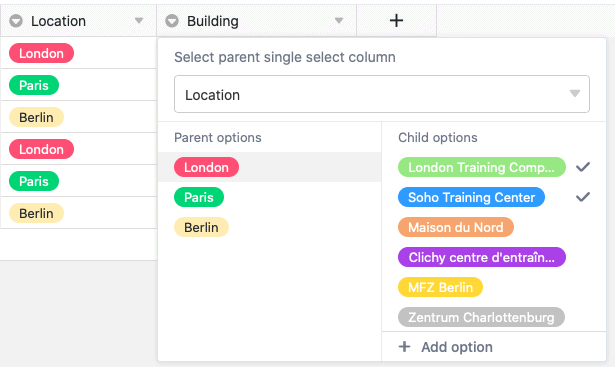
- Select a parent single select column.
- Assign any number of child options in the current column to the parent options of that column.
Example of a useful cascade
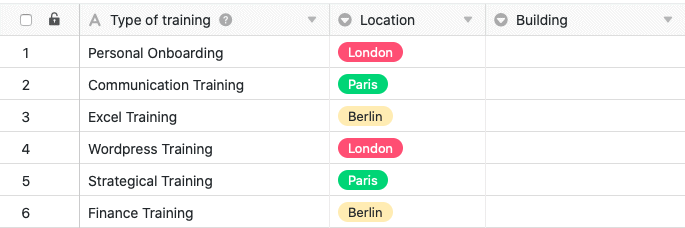
In this example, the table contains data on various education/training units for employees. In addition to the first column, which records various trainings, there is already a single-select column that specifies the respective location of the training. A cascade is defined in this example for a further single-select column, which records the exact building.
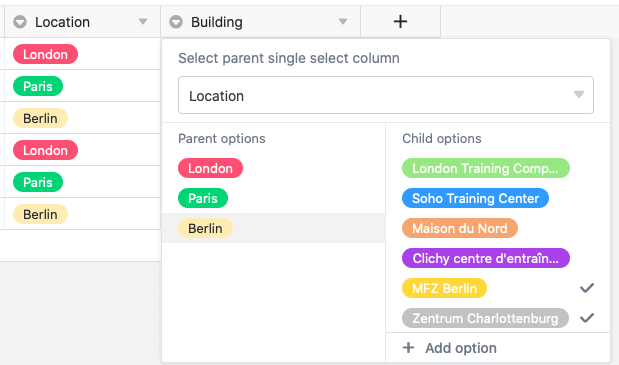
In this example, the “Location” column, which specifies the city in which the respective training takes place, serves as the parent single select column. The next step is to assign subordinate options from the newly created single select column “Building” to the three cities in this column. Specifically, the three options London, Paris and Berlin are assigned the buildings that are located in the respective city.
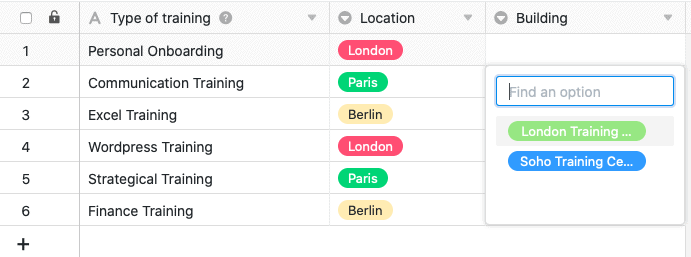
Which options or buildings can be selected in a cell in the subordinate “Building” column now depends on the city selected in the same row in the “Location” single select column. This allows you to select only the buildings that are actually located in the corresponding city.